So, looking back at part one, I was happy to get most of the server software installed and initially configured. However, I know there’s still quite a few things to do here. I haven’t even started to install Ruby or RoR yet, and it's always a lot of fun having to grab a hundred or so critical microsoft patches!
The next thing that I need to do is perform a few updates, namely running windows update to get the server up to par. Once done, I’ve decided to disable Internet Explorer protection, which is the largest nag feature ever invented for Windows Server Environments. Normally, in a production server environment, there’s absolutely no reason to have browsing enabled. But, since this is a 100% test environment, I want to enable it. The easiest way to do this is through the administrator tools à server manager.

If you click on the root of the Security Manager and scroll down to Security Information, you can click Configure IE ESC. I’m going to turn this feature off for both admins and users. It will make testing easier. But, again, on a normal production server you would not have any browsing on anyways so this would not be turned off.
Once our updates are completed and the server has been restarted, we can start thinking about how we want to go about the rest of the project.
Deciding on Web Servers
After much research, my goal is going to be to use Apache as a Web Server load balancer and couple it with a fast HTTP server that can run Ruby. I can go with either Mongrel or Thin in this respect, but I’ve decided that Thin will work best for this first project. Mongrel or Thin can work completely on their own without Apache, but they wouldn’t be able to handle load balancing and it would only allow for a very light load. This is why I’m using both together. The only thing to note is that Apache does not come with 64-bit support for windows. Oh well, we can’t have everything perfect now can we? To simplify things, here is a list of items I will be downloading before I continue:
Downloads:
Apache:
Ruby 1.9.2:
Developer Kit-Ruby:
Once everything has been downloaded, I’m ready to start the installation of Apache. Everything appears pretty simple here. I chose all of the defaults, changing the administrator email to a local one, and selected the default locations. Once the installation is completed, I see the apache icon in the system tray and it shows the service has been started. So far, so good. Let’s go ahead and install Ruby.
I’m going to keep the default ruby location for C:\Ruby192, but I will set the ruby executables in the path and associate the .rb and .rbw extensions. I will then click install and let it finish the installation.

Now that the basic installations are installed, let’s test out Ruby and see if it works.
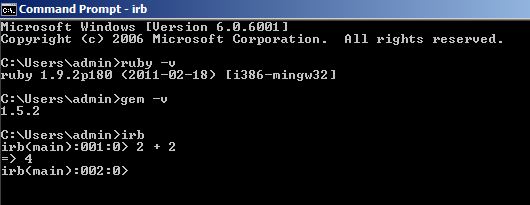
We can do ruby –v to find out our ruby version. We can also do a gem –v to find our gem version. Finally, we can run IRB and type in 2 + 2 to see 4.
The paths were already set so we can do this from any command prompt in any path. So far so good! If I run a gem update system there’s nothing to update. Okay, we’re in good shape here. At this point I’m going to save my snapshot and make sure everything is saved. We actually covered a lot in this part two, so we'll work on some new things in part three.
No comments:
Post a Comment